In 2005 I was experimenting with very large drawings, shopping for the biggest paper I could find. The first attempts were around 5x4 feet and the largest ones, 6x5. I hung them by attaching a flat piece of light wood to both the top and bottom, using clips. The piece was slightly larger than the drawing and tensioned the whole thing without being heavy or inconvenient. Unfortunately that’s not a permanent solution and many drawings suffered from endless moving apartment to apartment – not a good solution if I plan to see them hanging in a museum after my death.
This time, inspired by Josh’s almost-successful attempt and having a more permanent home, I decided to find a permanent solution. Josh used two pieces of glass held together with stainless steel bolts, but ran into the problem of hanging the structure being too heavy. It looks awesome though. But glass is fragile and expensive. Plus, I have a drawing which needs an 8x6 foot frame, which is substantially bigger than the one he has. He spent about a thousand dollars for two pieces of glass in Hong Kong. I checked out a few prices here in New York and was quickly adding up zeros between cutting the glass, transportation and assembly. It would have required a supporting structure to lift and hang too - a major construction project. I needed to multiply that by at least five frames and therefore possibly get a second job flipping burgers at night.
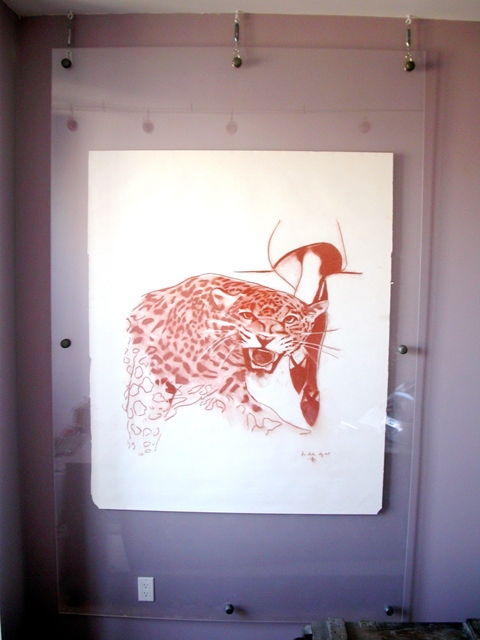
This is how I assembled and hung a 8x6 foot frame for half the price and in a safer and as durable way.
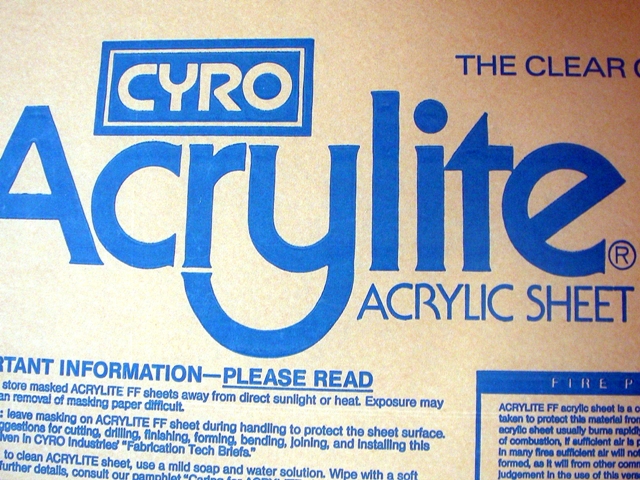
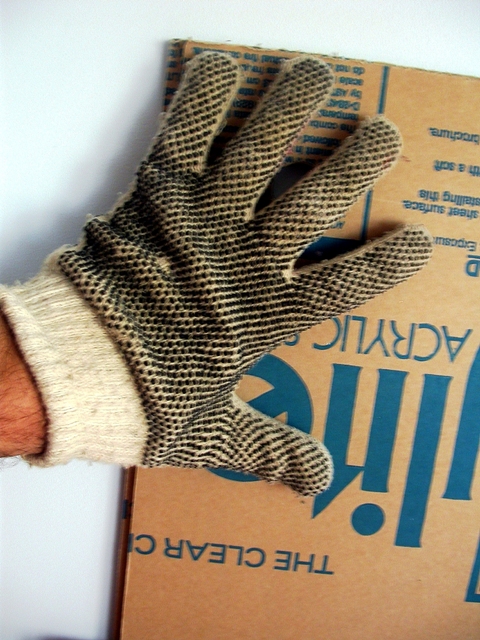
You all have seen plexiglass bolted together for large posters. If you don’t have a measuring tape the very large poster is about half the size of what I am hanging. I looked online for plexiglass manufacturers and got six transparent Acrylyc sheets 0.250x96x72 (8 by 6, quarter inch thick) shipped from RidoutPlastics. They are manufactured by CYRO here in Jersey so next time I’ll try going the direct route. I wanted four of them to be cut to 72x60 (6x5), but they screwed up and I received four sheets cut 96x60, a huge complication. They cut 1 inch holes for me, ten in the big sheets and six in the smaller ones. Now before you order anything like this, go measure your elevator. Each sheet is about fifty pounds and does bend a bit. The big ones just fit in my freight, if they were an inch bigger I’d be really stuck carrying six fifty pound flat sheets eight flights of stairs. The delivery is industrial trucking which usually just drops the palette and moves on. It required heavy tipping and a Spanish-English dictionary for the delivery guy to help me unload the stuff and bring the sheets up. You’ll need moving gloves, the plexiglass angles are rather sharp and you’ll need a good grip to carry each sheet separately.
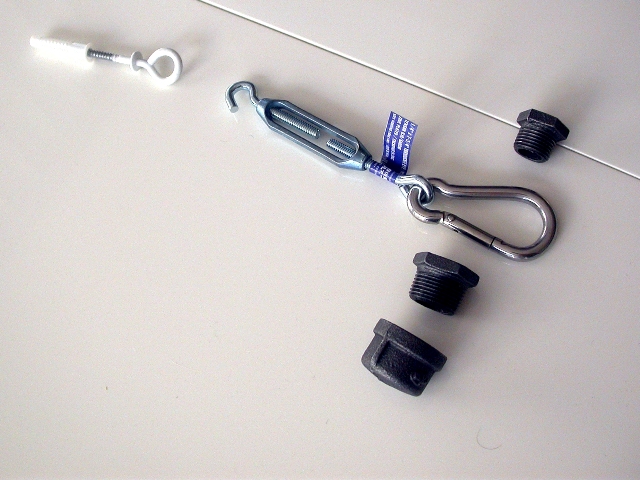
I quickly realized that I was facing a new problem: the holes I asked the manufacturer to drill were 1 inch in diameter. The biggest set of nuts and bolts I could find in stores was half inch, and one online retailer told me he had three quarters, but half a foot long! I could have bolted these together with a half inch bolt and two washers, but it just doesn’t look good nor is it safe. So I checked the plumbing department - large diameter plugs and bushings is a standard thing. My first idea was to mount a reducing bushing into a floor flange and attach the flange to the wall. When I submitted this to the very resourceful Russian plumber at a store on Neptune avenue he looked at me like I was a crazy person. He didn’t quite get my bushing and flange idea, but he did point out that the drywall will definitely collapse under a hundred pounds, and that I should suspend my structure from the concrete ceiling. “A good prison wall is made of concrete and not drywall”, he pointed out.
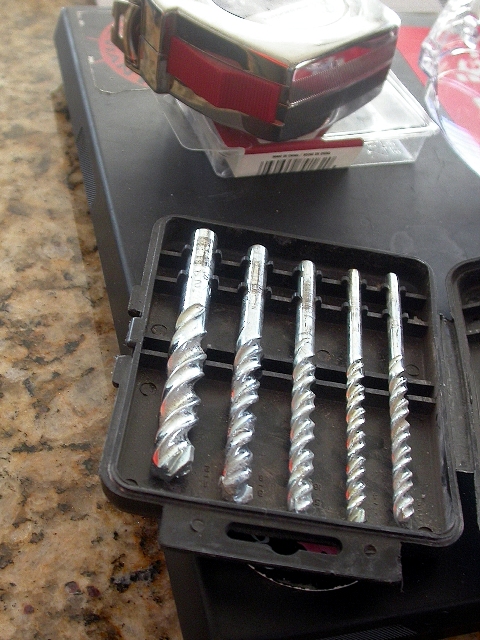
It took me two trips to Home Depot to figure out that a one inch bushing doesn’t fit in the hole that was factory-drilled. And then the sobering fact that a three quarter inch bushing doesn’t fit into that hole either. Plus the holes weren’t quite aligned. A round cutting drill bit of an inch and a quarter, specifically shaped for plastics was definitely the way to go to expedite this problem.
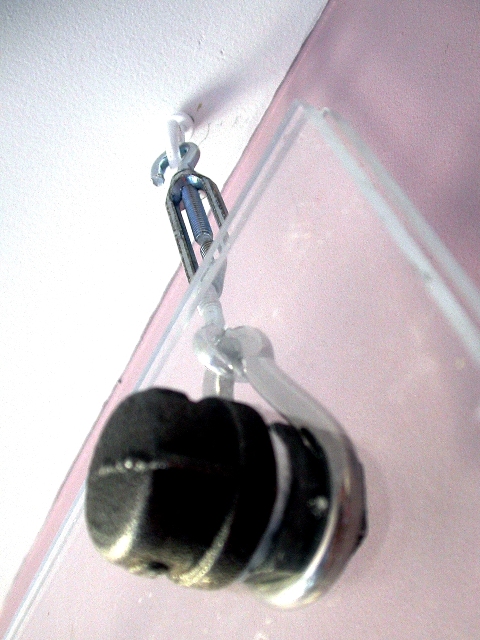
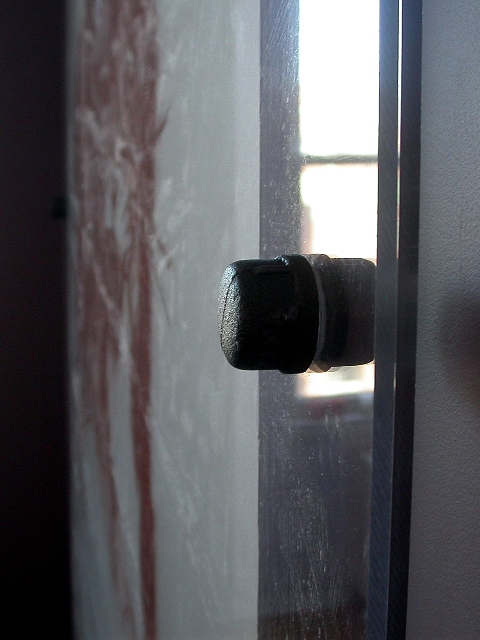
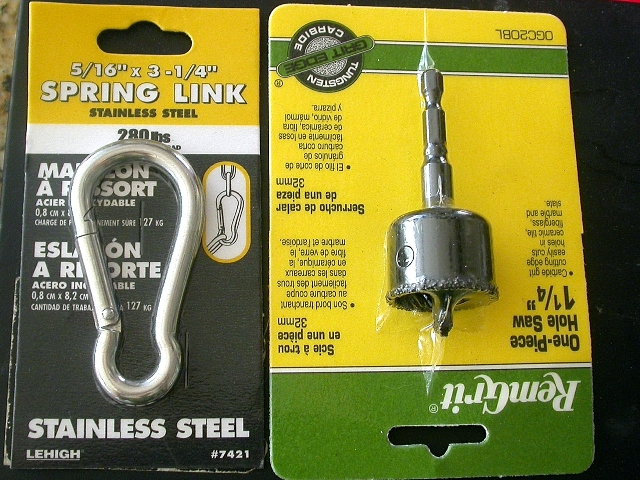
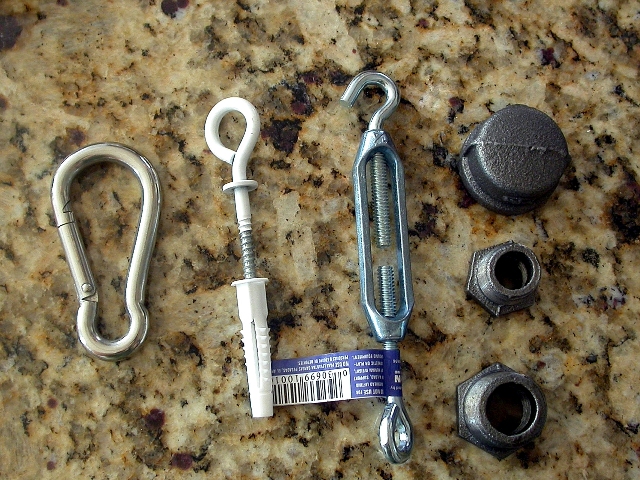
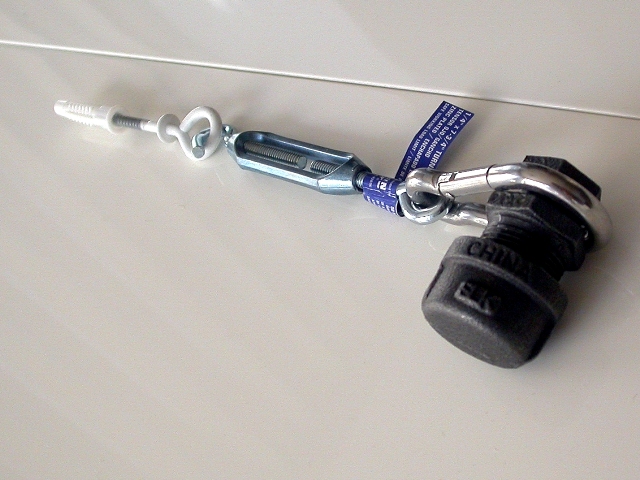
So I used a three quarter inch to half inch reducing bushing on one side and a three quarter inch cap on the other. The bushing is like a hollow screw. It was just long enough to bring two quarter inch pieces of plexiglass together – I should have used 0.15 plexiglass for the small frames. Hence, I couldn’t run a cable around the bushing to hang the frame either creating a new dilemma. I experimented with various attachments and ended up with a very simple and quick solution – a half inch to a quarter inch reducing bunching that simply screwed in the back of the quarter inch reducing one. I added a 5/16’’ spring link that fit perfectly tightened between the two bushings. Voila, I had my attachment.
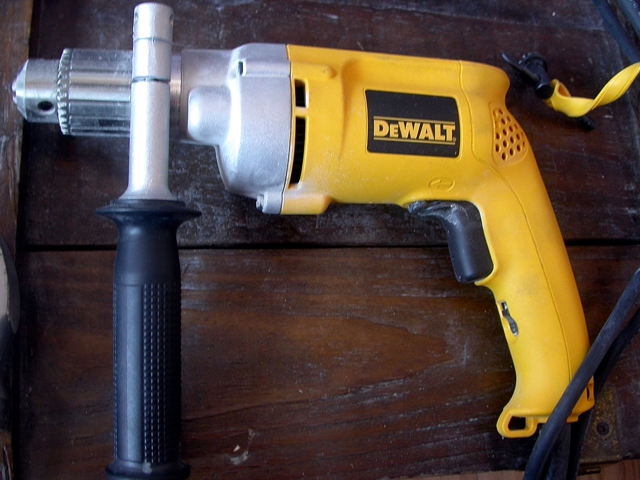
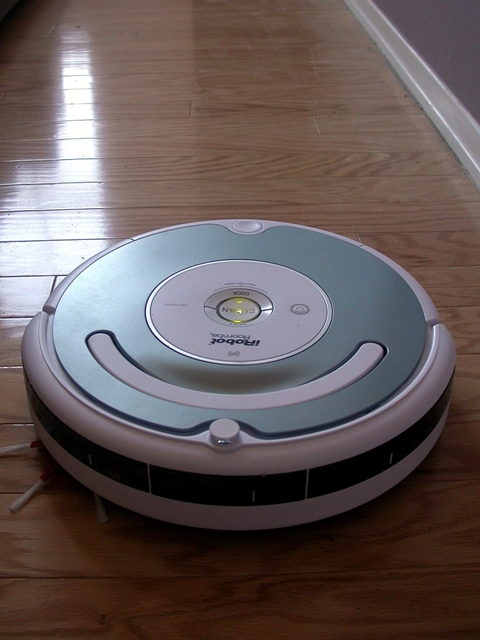
Drilling the armored concrete ceiling is a fun exercise. If you have never done it before, buy a real electrical drill, not a battery-powered screwdriver, and a set of good concrete bits. It’s a work-out. I used a plain screw eye on an anchor – a hundred pounds divided by three points of attachment doesn’t really require a specialized concrete one. I used a couple yoga bricks and a balancing act to lift the frame higher on a flat gun box so that I could directly hook everything together. I recommend getting a couple of guys to help unless you like to suffer like me. Finally, let your friendly iRobot cleanup the debris for you.
With 0.250 plexiglass sheets, transportation and hardware each of the frames ends up costing about $500 end-to-end, a cost that should be brought down with thinner plexiglass.